Expenses in Odoo: from receipt to reimbursement
Handle employee expenses in Odoo: record an expense with its receipt, submit it, approve it, post it to accounting and pay the employee back. Community and Enterprise.
- Community and Enterprise
- 4 min read
- Odoo + AI tutorial
A lunch with a customer, a train ticket, a hotel night: employees pay, then wait to be paid back, and someone has to check every receipt. Odoo Expenses keeps the whole path in one place: the employee records the expense with a photo of the receipt, submits it, the manager approves it, accounting posts it, and the reimbursement is paid. This guide follows one expense from the receipt to the payment.
It works the same in Community and Enterprise. The versions we tested are listed at the end.
This guide is also an AI tutorial. At the end, an AI assistant connected to Odoo checks nine expenses against the policy and approves the ones that pass, and spots the same lunch claimed twice by reading the receipts.See it in action ↓Before you start
- The Expenses app installed (it installs Employees and Invoicing).
- The employee exists, with an expense manager (here Marc Demo, whose manager is the administrator).
- Expense categories, such as Meals: they decide the account and the taxes.
- To approve, an Odoo user with the Expenses / Team Approver access right or higher.
1. Record the expense with its receipt
Open Expenses → My Expenses and press New.
- Description: Lunch with Ready Mat, 2 people.
- Category: Meals.
- Total: 72.50, the amount on the receipt, taxes included.
- Employee: Marc Demo. Paid By: Employee (to reimburse).
- Press Attach Receipt and choose the photo or PDF.
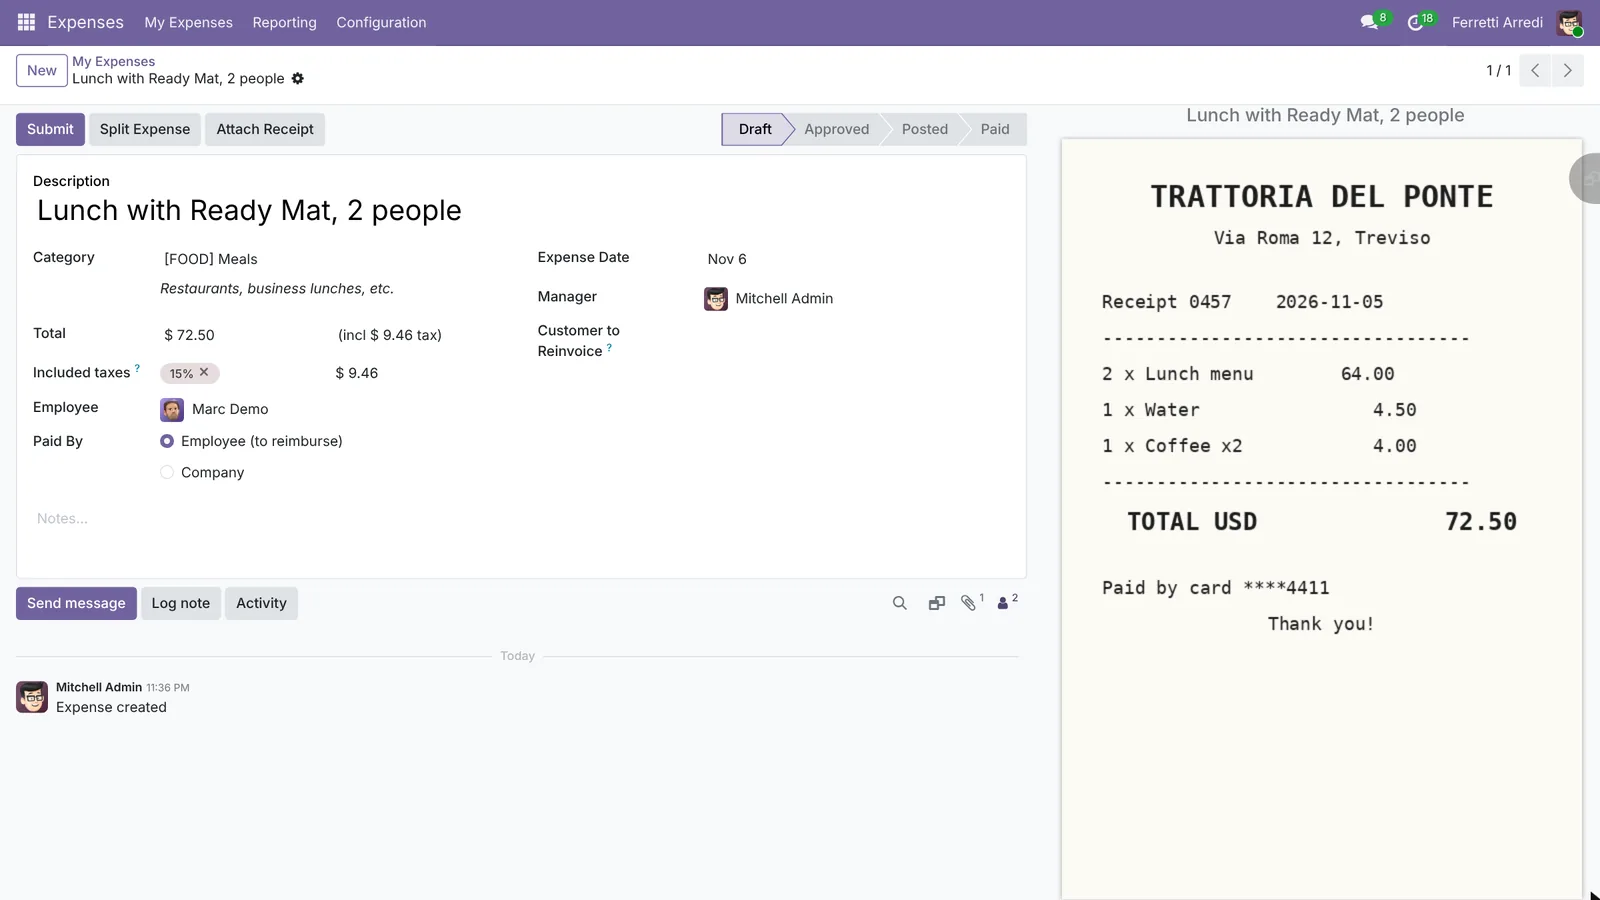 The receipt opens next to the expense, so the manager can check it.
2. Submit it
Press Submit. The expense moves to Submitted, and Odoo plans an Expense Approval activity for the manager.
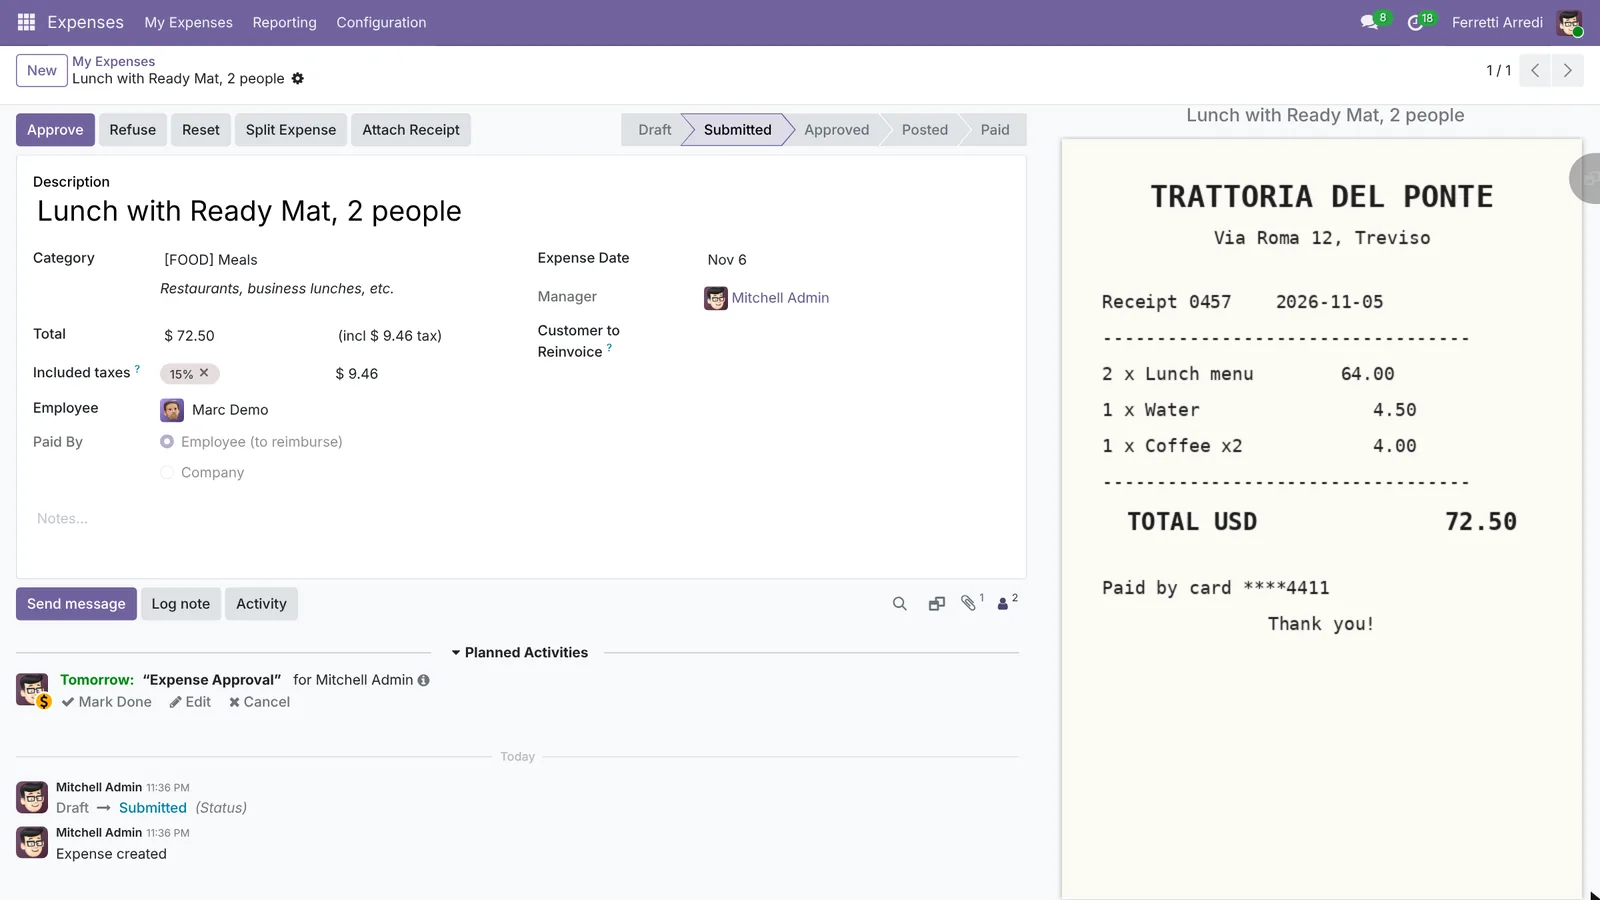 Waiting for the manager, with a reminder in their activities.
In Odoo 16 to 18, expenses go into a report first: press Create Report, then Submit to Manager on the report.
3. Approve it
The manager finds it in Expenses → My Expenses → Expenses to Process or in their activities, checks the receipt and presses Approve. Refuse sends it back with a reason.
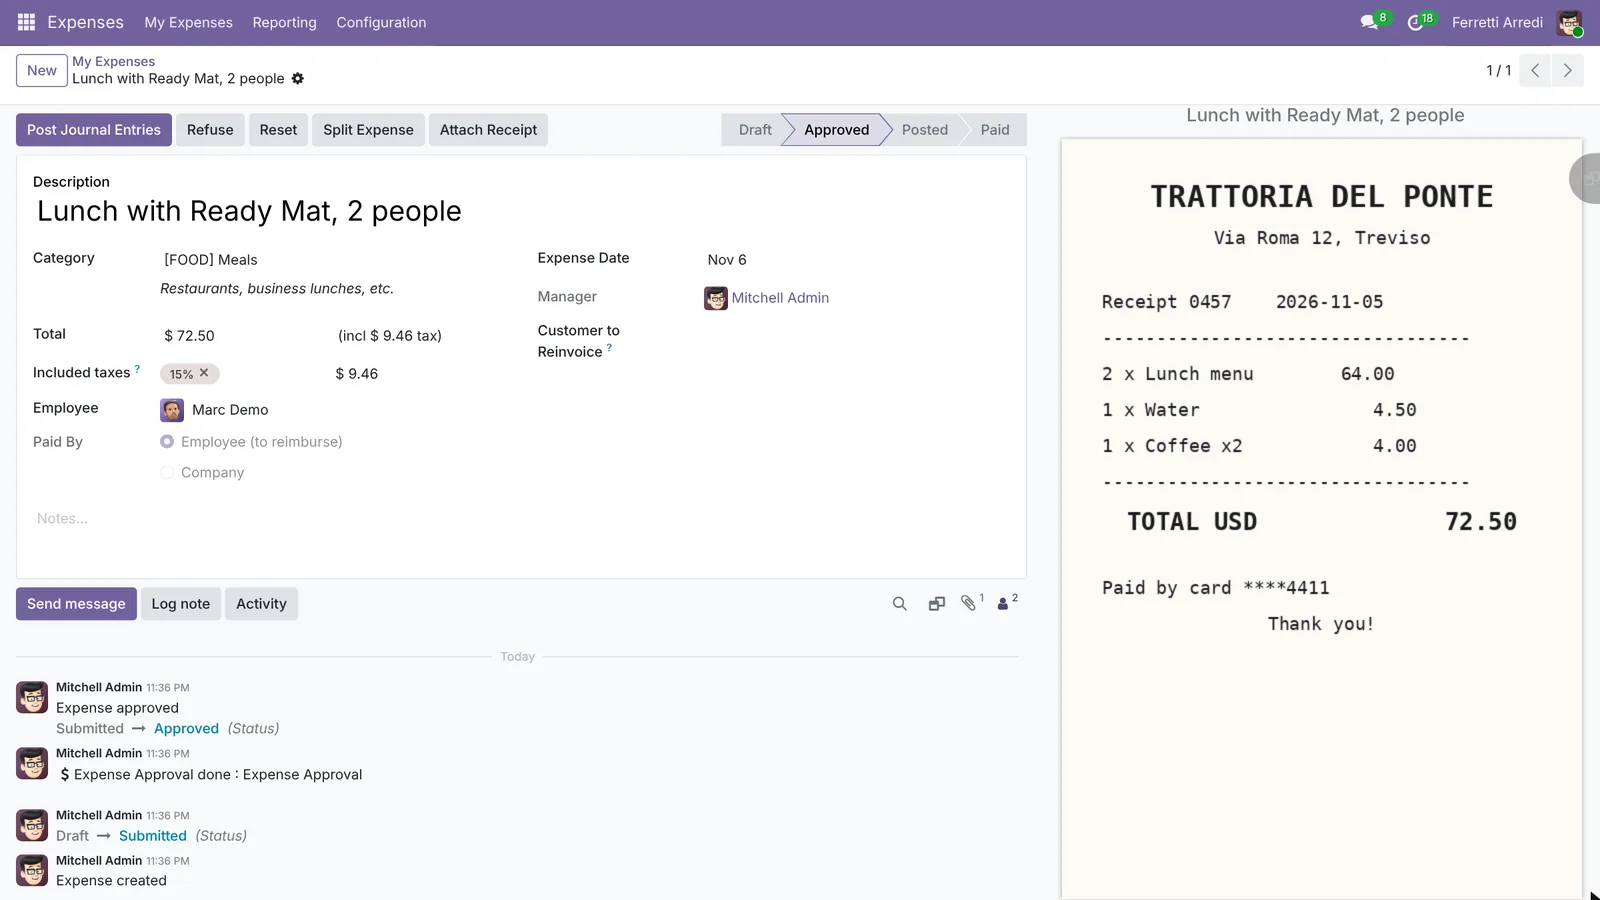 Approved: the next step is accounting.
4. Post it and pay it back
Press Post Journal Entries: Odoo posts the expense in the expense journal, with a debt to the employee. Then press Pay, choose the bank Journal and press Create Payment.
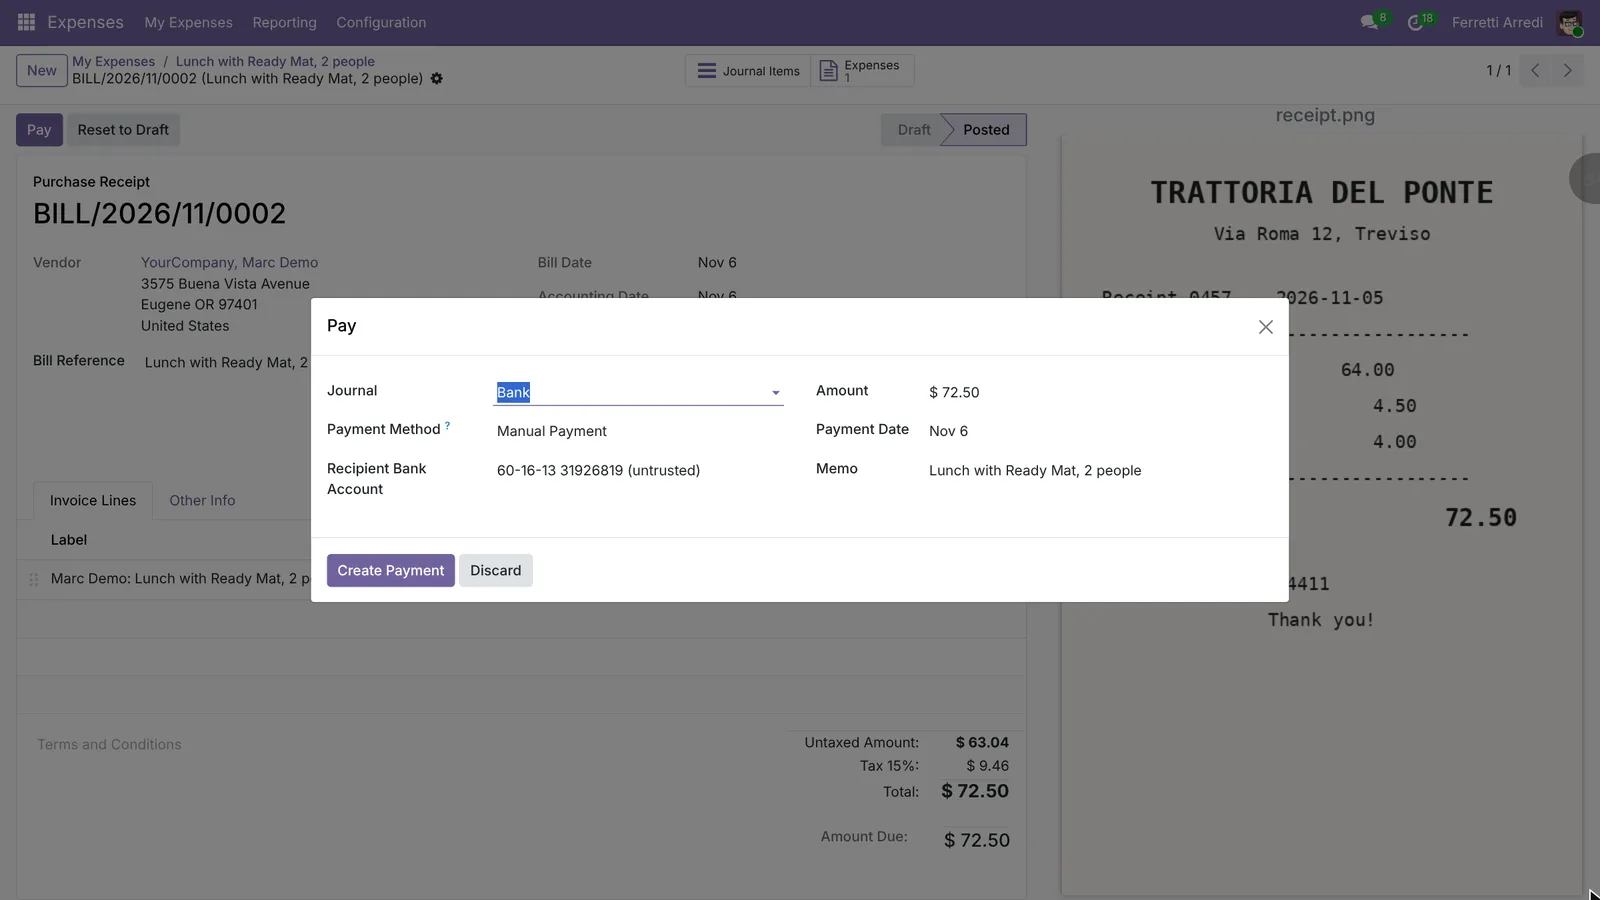 The reimbursement: $72.50 from the bank journal.
The expense is now Paid. When the bank statement comes in, reconcile the payment as usual.
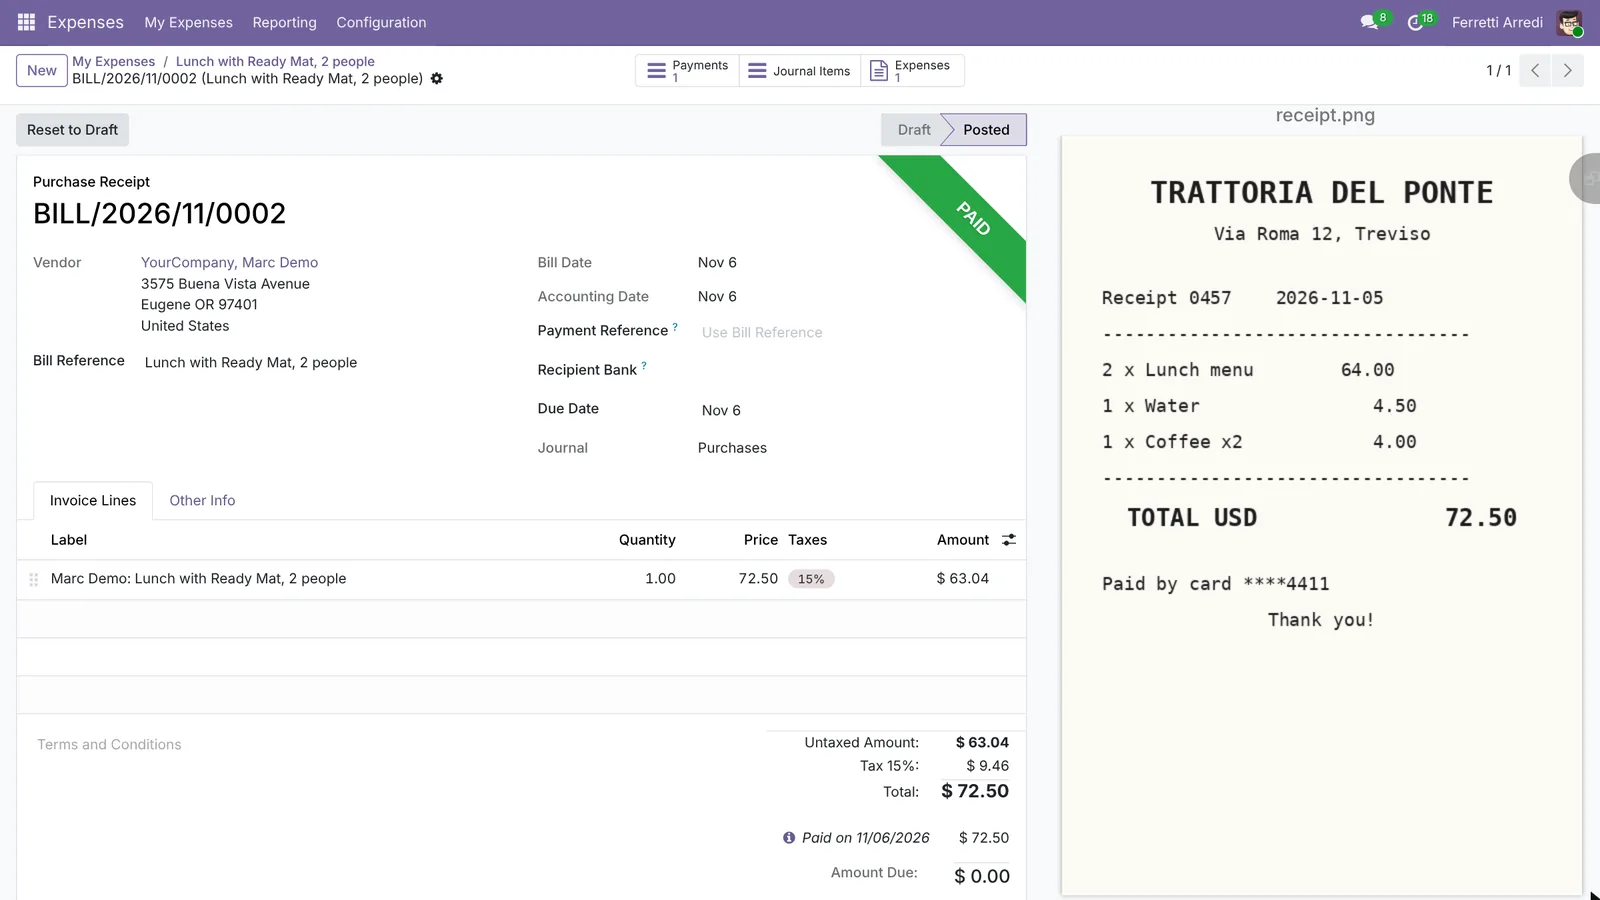 Paid, with the receipt kept on the entry.
Common mistakes
- No receipt. Ask for one on every expense over a small amount, and refuse the ones without it.
- The wrong category. It decides the account and the taxes: a hotel booked as a meal ends up in the wrong place in the accounts.
- Paid By Employee when the company card paid. Odoo then owes the employee money they never spent.
- Approving your own expenses. In Odoo 19 and later, if you are your own expense manager, your expense is approved as soon as you submit it. Give employees a real manager.
Expenses with AI: ask your AI assistant through MCP
With the Hawklify MCP server, Claude, ChatGPT and other assistants work in your Odoo as you, with your permissions. Checking each waiting expense against the policy, the amount per person, the price per night and whether a receipt is there, is a manager’s morning. The assistant does it in one question.
On the computer. Depending on how your organisation set up the server, the assistant makes the change straight away or first shows you a card to approve. Here card mode is on: nothing is approved until you approve the card.
Nine expenses are waiting, from four trips. Two problems:
- Sara Conti, Hotel Chicago, 1 night: $210.00, over the $150 limit.
- Paolo Greco, Parking, $30.00: no receipt.
The other two trips follow the policy, every receipt attached:
- Luca Bianchi, Milan trade fair: hotel $140 a night, dinner $45 a person, taxi. $453.00.
- Elena Ricci, Dealer training: train, lunch $43 a person. $296.00.
Want me to approve those five, $749.00, and leave the other two trips waiting?
Approval needed in OdooRun
Approve the 5 expenses of Luca Bianchi and Elena Ricci that follow the policy and have a receipt: $749.00.
hr.expense · 5 records
Hotel Milan, 2 nights
Dinner with Azure Interior, 3 people
Taxi to the fair
Train tickets
Lunch with dealers, 4 people
Change applied in Odoo.
Organisation administrators can turn the approval cards off on the Members page.
Five expenses approved, $749.00. Still waiting: Sara Conti's trip (ask her why the hotel was $210) and Paolo Greco's (ask for the parking receipt).
Next to the expense. In a side panel of the browser, the assistant starts from the expense you have open, and compares it with what the form doesn’t show: everybody else’s expenses.
The lunch itself is fine: 2 people, $72.50, $36.25 a person, receipt attached.
But the same receipt was claimed twice. Luca Bianchi submitted Lunch Ready Mat too: Trattoria del Ponte, receipt no. 0457 of Nov 5, $72.50. It's the same bill.
Keep Marc's and refuse Luca's as a duplicate?
Done. Luca's is Refused, with the reason Same receipt (Trattoria del Ponte no. 0457) already claimed by Marc Demo, which he sees on his expense. Marc's lunch can go ahead.
Versions we tested
| Version | Result |
|---|---|
| Odoo 16 | Expenses go into a report: Create Report, Submit to Manager, then Approve, Post Journal Entries and Register Payment on the report. |
| Odoo 17 | Like 16. |
| Odoo 18 | Like 16 and 17. |
| Odoo 19 | As in this guide: each expense is submitted, approved and paid on its own, and the payment button is Pay. The screenshots come from Odoo 19. |
| Odoo 20 | No Post Journal Entries button: approving creates the journal entry. Open it from the Journal Entry button, press Confirm, then Pay. |
Frequently asked questions
Who approves an expense?
The employee's expense manager, set on the employee form (in the Work Information tab, or HR Settings in older versions). Without one, the employee's manager, then any user with the Expenses / Administrator right.
What if the company paid with its own card?
Choose Company in Paid By. Odoo then posts the expense against the company's account instead of creating a debt to the employee, and there is nothing to reimburse.
Can employees send receipts by email?
Yes. Set an alias in Expenses, Configuration, Settings: each email sent to it creates an expense with the attachment, for the employee whose email address sent it.
How do I refuse an expense?
Press Refuse and give the reason. The employee sees it in the chatter and can fix the expense and submit it again.
Questa guida è disponibile anche in italiano: Note spese Odoo: dalla ricevuta al rimborso
Related Odoo guides
 AccountingBank reconciliation in Odoo: match payments to invoicesReconcile bank transactions in Odoo Enterprise: match payments to invoices, handle a payment with no reference, and book bank fees with a model.
 Human ResourcesFleet in Odoo: vehicles, odometer and servicesManage company vehicles in Odoo Fleet: add a vehicle and its driver, log the odometer, record a service with its cost, see what each one costs. Community and Enterprise.
 Settings & ProductivityMulti-company in Odoo: two companies in one databaseRun two companies in one Odoo: create the company, give users access, use the switcher, share customers and see what each company keeps. Community and Enterprise.